Your ad blocker is preventing some content from displaying properly. Please disable it to fully enjoy the site.
Here we show you step-by-step how to create an event with online ticketing at Eventfrog.
If you have already created an Eventfrog account as an organiser, you can log in directly via "Create event" in the header area of the website. You will then be taken directly to the event creation process.
If you don't have an account yet and would like to register with Eventfrog, you can do so here. To the registration >
We show you which details are required for an account as an organiser under "My profile".

If you are logged in, you can also start the recording process in the cockpit by clicking on "Create event".
The most important event information is recorded first.
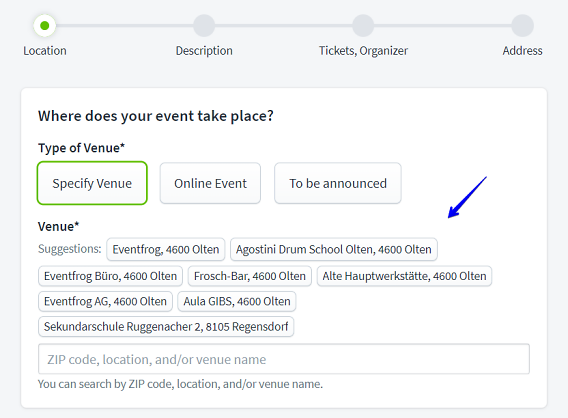
When creating your event on Eventfrog, you start by selecting the venue. Here you have the option of either selecting an already known location, defining a completely new venue, labelling your event as an online event or indicating that the exact location will be announced at a later date.
When you enter a venue, Eventfrog suggests venues that have already been used. If the venue you are looking for is included, you can simply select it. You also have the option of customising the name of the venue for the event details in order to display it differently.
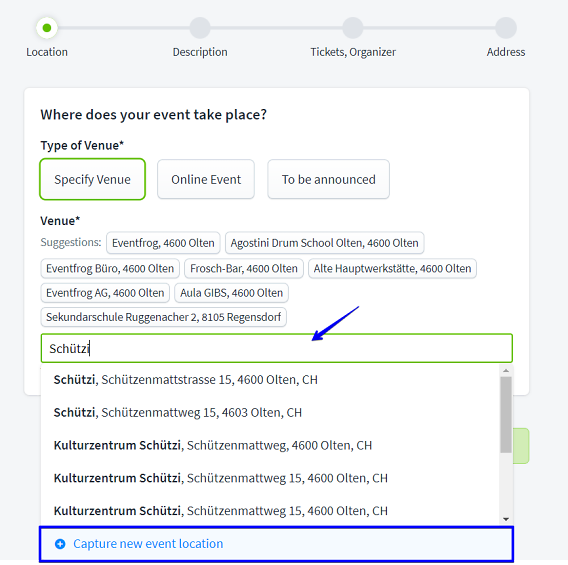
If your venue does not appear in the suggestions, you can search for and select it using the search field. It is also possible to add a new venue here if your desired location is not listed.
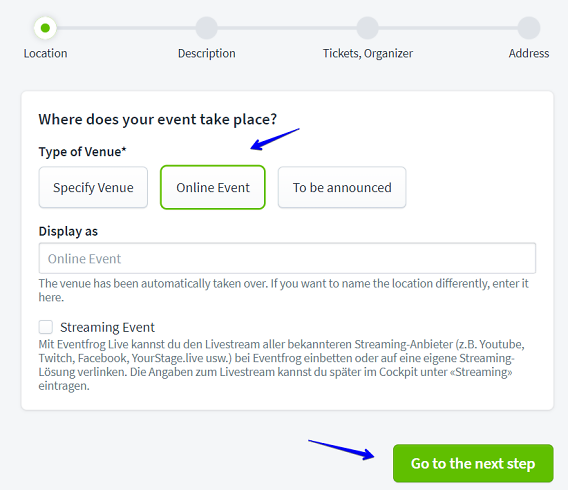
If you decide to set up an online event, you have the option of changing its name and marking it as a streaming event. You can add the corresponding streaming URL at a later date.
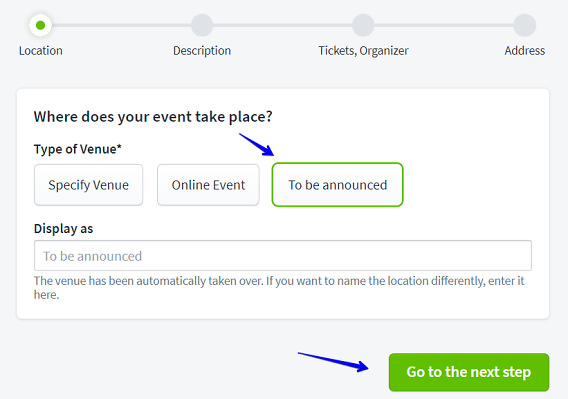
If the venue has not yet been determined, you can note that it will be announced. The placeholder "To be announced" is used by default, which you can adjust if necessary.
In the next step, you define the details of your event with the help of the Eventfrog AI. This includes entering the event description, selecting the appropriate category and setting the date. The required information includes the title, a short description, the event category and the date of the event.
Give your event a title that summarises it concisely and makes it clear what it is about.

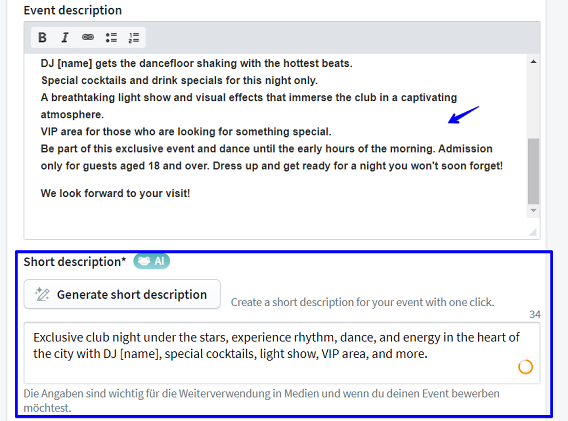
In the event description, you have the freedom to share all relevant information about your event in detail.
For the short description, which can contain a maximum of 200 characters and can also be used for advertising purposes, it is possible to have it generated from the more detailed description using Eventfrog AI.
This provides an efficient way to create a concise summary of your event that emphasises its key points.
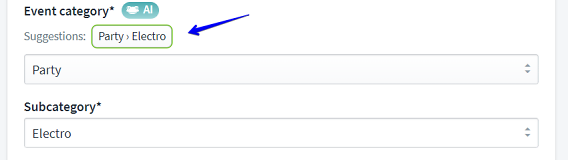
Eventfrog AI helps you choose the right category and subcategory by making suggestions based on your event description. Either select one of these suggestions for your event or browse through the extensive list of over 200 categories to find the ideal category for your event.
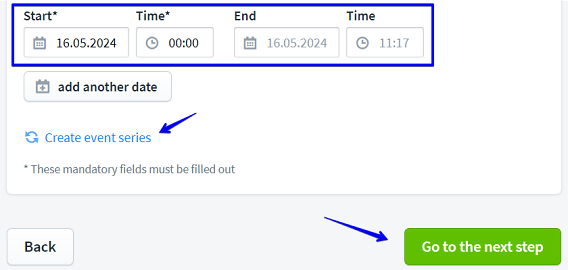
After selecting the category and subcategory, you specify the date of your event. At this point, you also have the option of specifying whether your event is part of a series.
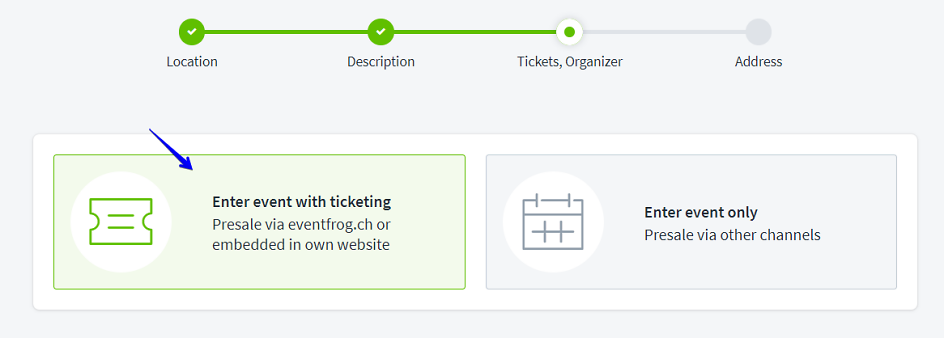
In the second step of event entry, you can create your tickets for sale and select settings for ticket design. You can also create a seating plan (also possible later).
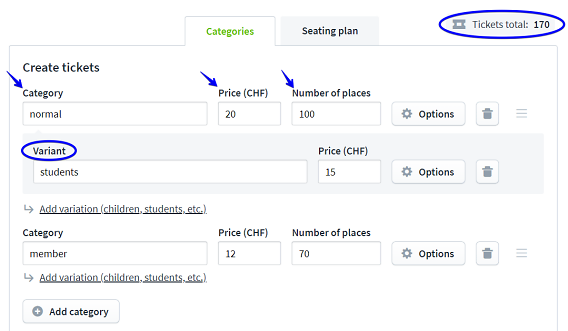
You can create several categories for your event (e.g. normal, VIP, reduced) and enter different prices. You can also enter variants for each category that you can use for discounts.
You can also specify the number of tickets or seats here. Under "Total tickets" you can see the total quantity.
You can find more options for category settings under "Create tickets" in the help section.
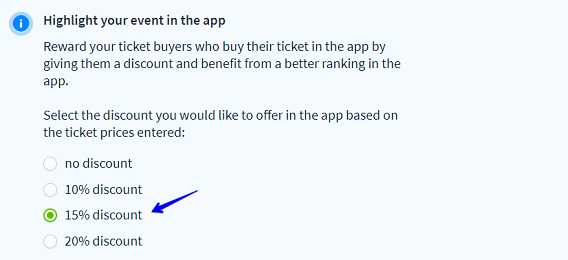
When creating tickets, you decide whether ticket buyers receive a discount when making purchases in the app.
Your advantage: If you grant a discount for direct purchases in the app, you improve the placement of the event.
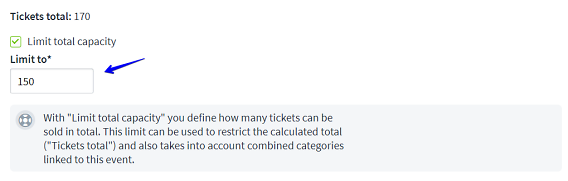
If you want to limit the number of seats in general, you can reduce the total quota.
This allows you to limit the number of tickets across individual categories.
In the next step, you can design your tickets.
You can make your settings on the left and see an example preview of the tickets on the right.
With the Pro model, you can completely exclude third-party advertising. In the Plus model (example), you only enter a sponsorship logo.
You can find out more about ticket design here >
You can still customise or change the design of your tickets later.

You can book advertising with Eventfrog even before your event is published.
The advertising boost is a special offer and can only be booked when creating the event or directly before the event is published.
We explain how the boost works and what benefits it brings you here >

In order to sell tickets via Eventfrog, an organiser address must also be entered.
This is mainly for legal reasons, as the sale constitutes the conclusion of a contract.
The first time you create an event, you must fill in all the details completely. This address will be suggested again for events that you create afterwards (see below).
All information on registration and the necessary details for organisers can be found here >
Then click on "Continue to next step".


You have now completed entering the event and are in the cockpit. Here you can create, edit, view and publish your events.
If you click on the "Preview" button, you can see how your event will be displayed in detail on the platform.
You can still change any details before publishing.
After publication and the first ticket sale, some details can no longer be changed.
You can find an overview of the feasible changes here: Possible adjustments after publication, the first ticket sale or after blocking tickets >
To publish the event, click on the "Publish" button.

In the event description, you have the freedom to share all relevant information about your event in detail.
For the short description, which can contain a maximum of 200 characters and can also be used for advertising purposes, it is possible to have it generated from the more detailed description using Eventfrog AI.
This provides an efficient way to create a concise summary of your event that emphasises its key points.

Eventfrog AI helps you choose the right category and subcategory by making suggestions based on your event description. Either select one of these suggestions for your event or browse through the extensive list of over 200 categories to find the ideal category for your event.

After selecting the category and subcategory, you specify the date of your event. At this point, you also have the option of specifying whether your event is part of a series.